Fascia Installation. Getting It Right From the Start
Most fascia problems homeowners face later. rot, gutter failure, water intrusion. trace back to poor original installation. Undersized boards, missing drip edge, improper priming, and gutters hung with spikes instead of screws are installation errors that create predictable, avoidable failures. Soffit Fascia Repair's licensed professionals eliminate these failure modes through proper installation from day one.
Whether you're finishing a new addition, completing a renovation, or replacing fascia that was never installed correctly the first time, the process starts with the same foundation: properly sized lumber, correctly prepared surfaces, and the right sealing sequence.
Fascia Installation Components
Board selection. Standard fascia uses 1×6 or 1×8 boards depending on your rafter depth. For homes with oversized rafter tails, deeper boards may be needed. Material choice. primed pine, cedar, PVC, or aluminum fascia board. is determined by your climate, budget, and whether the board will be aluminum-capped.
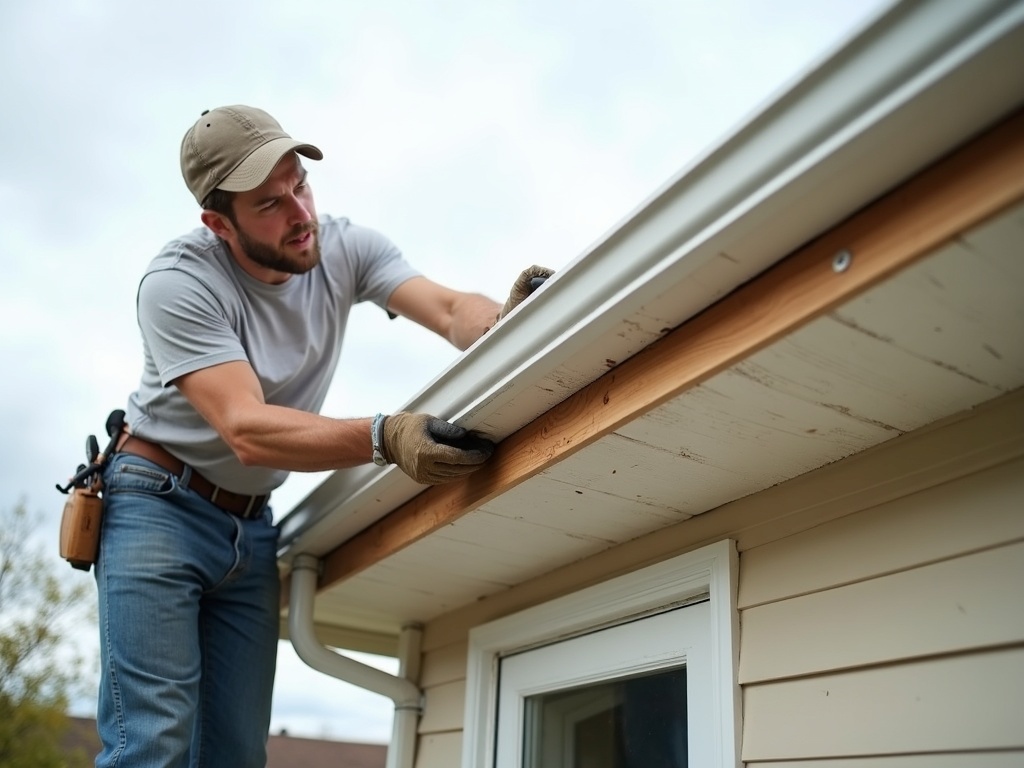
Drip edge. Drip edge flashing is installed at the roof-to-fascia interface before fascia boards go up. This is the most critical detail in fascia installation. it directs water from the roof edge into the gutter rather than behind the fascia. On too many homes, it's missing entirely.
Board installation. Boards are cut to length with staggered joints. no two adjacent boards share the same splice point. They're fastened through the board face into the rafter tails using stainless or galvanized screws (not nails, which back out over time). Joint edges are caulked with a paintable exterior sealant.
Aluminum capping (optional but recommended). Aluminum coil stock is bent to profile and snapped over the wood substrate, covering all exposed faces. This eliminates the need for future painting and seals the wood against moisture permanently.
Priming and painting (for uncapped wood). If the boards won't be capped, back-priming (priming all four sides before installation) is the key step most contractors skip. Back-primed boards resist moisture absorption dramatically better than boards primed only on the face after installation.
Caring for New Fascia
Aluminum-capped fascia needs essentially no maintenance beyond an occasional rinse to clear off dirt and pollen buildup. Bare wood fascia should get a quick inspection each fall. check caulked joints for cracking and touch up any exposed end grain with primer before winter moisture sets in. After heavy storms, walk the perimeter and look for gutter hangers pulling away from the board, which is often the first visible sign that a fastener has backed out rather than that the wood itself has failed. Catching a loose hanger early is a five-minute fix; catching it after the board has rotted around the fastener is a much bigger job.
Cost Guide
| Scope | Typical Range |
|---|---|
| One side (40–60 LF) | $500–$1,000 |
| Full perimeter (150–200 LF) | $1,500–$3,200 |
| With aluminum capping | Add $1–$2.50/LF |
What's the difference between fascia installation and fascia replacement?
Replacement involves removing existing damaged boards and installing new ones. the approach taken when existing fascia has failed. Installation refers to new fascia being installed where there was none before, or as part of a larger new construction or renovation project. The materials and installation process are the same; the context differs.
Should I always get aluminum capping on new fascia?
For most homeowners in wet climates, yes. Aluminum-capped fascia eliminates future painting, completely seals the wood from moisture, and typically adds 15–20 years to the board's service life. The upfront cost difference is modest compared to the maintenance savings over 30 years. In dry Southwest climates where wood paint lasts 10+ years between coats, the calculus is different.
When should fascia installation be done relative to gutters?
Fascia goes in first, then gutters are hung. Never install fascia over existing gutters. the gutters need to come off to properly access the fascia boards, install drip edge, and ensure correct alignment. Many homeowners bundle fascia and gutter work together to avoid two separate trips up the ladder.
How long does fascia installation take?
A single elevation typically takes half a day. Full perimeter installation on an average home takes 1–2 days. Coordination with gutter installation adds another half day to a full day depending on the home's perimeter length.
Does new fascia need to be painted?
If it's aluminum-capped, no painting is needed. If it's bare wood (primed pine or cedar), it should be painted within 30 days of installation to seal the primer coat. Back-primed boards are already sealed on all four sides, so paint is applied only to the face and any exposed cut edges.